

Whether you use a note-taking app for work, studies, or personal use, you need to consider how it can keep your notes secure. Especially now, since we are sharing more information online than ever.
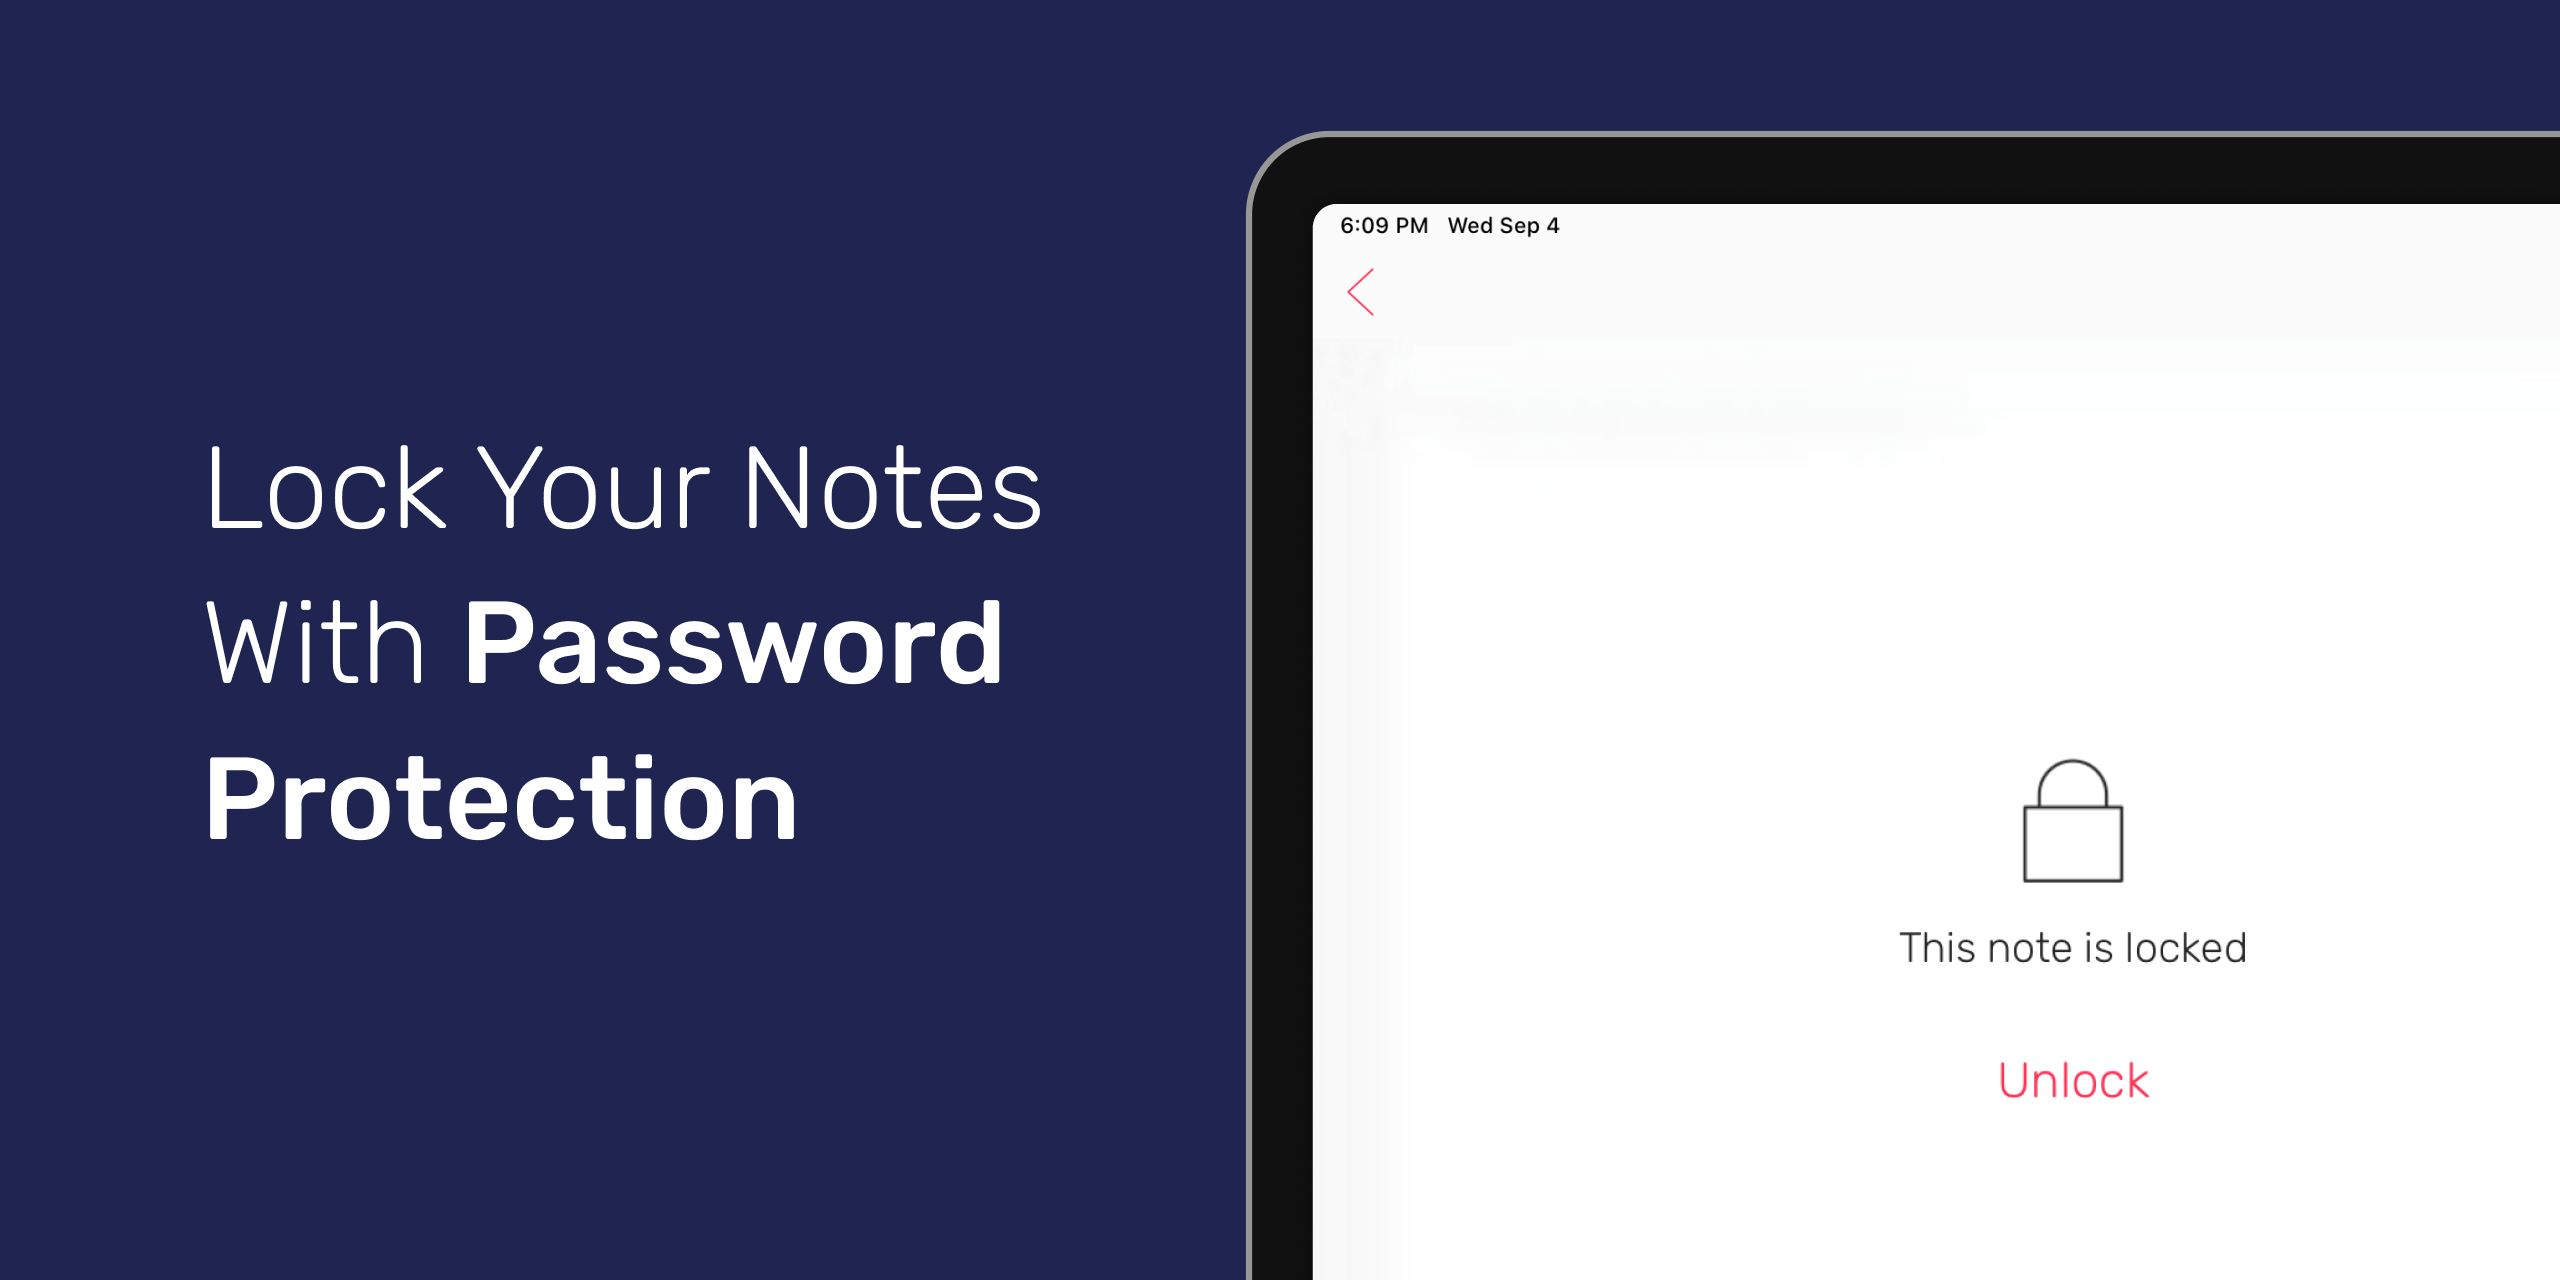
The Lock Note function on Noted is designed specifically to safeguard your notes, and it only takes seconds to set up so there’s no excuse for leaving your notes exposed.
Why You Need to Password-Protect Your Notes
Let’s delve into why it’s so important to keep your notes secure – whoever you are.
For Professionals
You wouldn’t leave your filing cabinet unlocked if you were storing a large amount of sensitive information in it, so why would you leave your digital notes open to prying eyes?
The principal reason to keep your work notes protected is to ensure the safety of all the information that’s shared in the workplace. You never know what will be discussed at work and what sensitive information may be passed around so it’s best to be safe than sorry.
For Students
From your flatmates’ birthdays to website logins, you have a hundred and one things to remember, as a student you may have a lot of information that you want to keep private from people around you. By locking your notes, you can make sure such data is protected.
How to Use the Lock Note Tool
Your password on Noted acts as a master password, meaning the same password applies to all your notes. Here’s how to use Noted’s Lock Note tool on iOS and macOS devices.
iOS
To lock a note for the first time:
- 1. Swipe left on the note then tap the Lock symbol.
- You will be prompted to set up a one-time password, in addition to being able to use Touch ID/Face ID as a quicker alternative (if available).
You can change your password or deactivate Touch ID/Face ID in Settings > Password.
To unlock a note:
Tap as you normally would and you’ll be asked to authenticate before the content is shown.
When a note is unlocked, all notes stay open until the master lock is applied by tapping the opened lock at the bottom left of your screen. You will have to unlock the notes again when you…
- Start the app fresh
- Lock or reboot your device
- Enter into background for longer than 30 seconds
To remove a lock:
Swipe left on the note then tap the unlock symbol.
macOS
To lock a note for the first time:
1. Click on the locked note you want to unlock
2. Click the word Unlock, or right-click the note and select Remove Lock from the drop-down menu
3. When prompted, use Touch ID or enter your password to unlock the note.
You can change your password later in Settings > General.
To unlock a note:
Click as you normally would and you’ll be asked to authenticate before the content is shown.
When a note is unlocked, all notes stay open until the master lock is applied by clicking the Lock on the toolbar and choosing Close all locked notes in the drop-down list. You will have to unlock the notes again when you…
- Start the app fresh
- Lock or reboot your device
- Enter into background for longer than 30 seconds
To remove a lock:
Click on the note which lock you want to remove, then select Remove lock.
To remove lock on all locked notes, click the Lock on the toolbar and choose Remove lock in the drop-down list.
FAQs
Can Noted see my notes?
No, your data is stored, encrypted, and transmitted securely on your Apple device and Apple’s iCloud server if sync is enabled, and we do not have access to it.
What if I lose or forget my password?
We can’t help you regain access to locked notes if you forget your password. For that reason, we strongly encourage you to add a password hint when creating a new password.
What happens to my other devices?
Lock status is synced instantly, which means if you lock one note on your iPhone the password is immediately applied to the same note on your iPad, Mac, etc.
If your other devices don’t have Touch ID/Face ID set up, we will ask for your one-time password instead.
Why am I having trouble using Touch ID/Face ID?
Make sure you’ve allowed Noted to access Touch ID/Face ID in your iOS settings, which you can find at Settings > Touch ID/Face ID & Password. By enabling Noted to use Touch ID/Face ID, the app will use this method instead of the password until it’s manually disabled.
Keep Your Notes Secure
Whether you use Noted at work, at university, or at home, the Lock Note feature lets you control access to notes, so start using it today!
Love Noted as much as we do? Sign up for our newsletter for more tips, and give us a shout-out on Instagram or Twitter!
